Sunday, February 20, 2022

AYWMC: Part 2 Lesson 3: Thinking About the Whole Frame

This post is part of a series entitled A Year With My Camera.  
 
Lesson 2.3 in my own words
  • The last several lessons focused on thinking about the subject. This lessons focuses on the whole frame, i.e. putting the subject into context.
  • 4 composition principles:
    • 3s and 5s - slight asymmetry is aesthetically pleasing to humans.
    • Fill the frame - no foreground and background. Makes a more abstract presentation.
    • Symmetry - can be horizontal, vertical, or diagonal.
    • Diagonals - add tension and interest to a photograph.

This week's project

Using viewpoint (good foreground/subject/background balance) and a single focal point, think about how an image works in the frame. Choose at least one of the four composition techniques and create a thoughtful, aesthetically pleasing photograph.

3s and 5s

Fill the frame

Symmetry

Diagonals

What I learned

For drawing and painting, compositions can be pieced together. For a still life, I can add another apple, or move the pottery pitcher to the left or right as I compose the composition. With nature photography, I had to be more thoughtful about it. I had to find more "ready made" compositions that fit one of the four composition principles. So even though the concepts are easy to understand, finding them as pleasing compositions in nature was challenging. For example, finding symmetry. I had to really think about it and look around. 

In looking back over my photos, there seems to be some overlap in the principles we were supposed to focus on. I think, in part, this was because I had trouble mentally focusing on the frame rather than the subject. This exercise helped me realize that even though I can understand concepts in one way, doesn't mean there aren't more ways to explore and understand.

Sunday, February 13, 2022

AYWMC: Part 2 Lesson 2: Single Focal Point

 This post is part of a series entitled A Year With My Camera.
 
Lesson 2.2 in my own words
  • Where do you put your subject?
    • Consider viewpoint first.
    • Next, decide precisely where in the frame to put the subject.
  • Why just one subject?
    • The viewer will instinctively search the photo for something to rest their eyes on.
    • Without a distinct focal point, the image conveys chaos, unsettledness, randomness, restlessness
    • One distinct focal point gives the viewer something to find and look at.
  • The photographer's goal is to compose the photo in a manner that leads their eye to that focal point.

This week's project
  • Using just one subject, choose at least one of the following composition techniques with which to experiment.
    • Rule of thirds - Imagine the frame divided into thirds (vertical and/or horizontal). Place the subject on one of the imaginary lines that divides the frame into thirds.
    • Leading Lines - Visual prompts that lead the eye to the subject. For example: footpaths, walls, shadows, etc.
    • Background separation - Use distinct contrast between the subject and the background. For example: color, light and dark, texture, depth of field, etc.

Rule of thirds

And in case you couldn't visualize what I meant by rule of thirds in my description, here's the same photo with the grid lines Gimped on.

Rule of thirds grid

Leading lines

Background separation

What I learned

This lesson was a refresher for me. I didn't learn anything new, but I had an opportunity to practice it with the camera.

Thursday, February 10, 2022

TAD: Romance

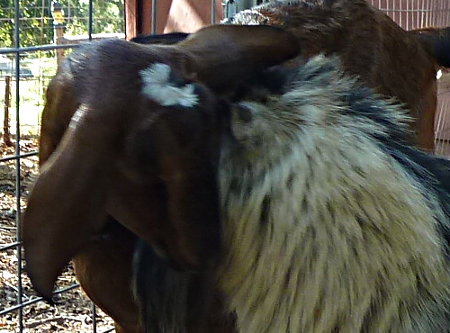
Rain's Thursday Art Date is being guest hosted this week by Christine. (Thank you Christine!) My contribution is goat romance!


Tuesday, February 8, 2022

AYWMC: Part 2 Lesson 1: Composition Elements

 This post is part of a series entitled A Year With My Camera.
 
We're out of the technical lessons and on to the fun stuff! 
 
Lesson 2.1 in my own words
  • Good composition is a balance of 3 key elements:
    • Foreground - traditionally a small element that leads the viewer into the image
    • Background - offers context and contrast but doesn't distract
    • Subject - best to stick with just one subject
  • Whole frame
    • Choose the composition in the frame then step back and take in the entire image
    • Check for balance
    • What path with the viewer's eye take into the photograph?
  • Use viewpoint to change the balance of the elements
    • Move the camera or yourself to change your point of view.
    • Visualize what you want and think how to get it

This Week's Project

Use the same subject and take 5 different photographs by changing only viewpoint. 
  1. Mostly subject 
  2. No foreground at all 
  3. Mostly foreground 
  4. Mostly background 
  5. A pleasing balance between all three
Mostly subject

No foreground


Mostly foreground

Mostly background

A pleasing balance of all three. (I hope).


What I learned

I've had a lot of art classes, so the information about composition was pretty familiar. For photographs, I'm always aware of background clutter (the cutest baby pictures aren't so cute when there's a mess everywhere else!), but for composition, I've always relied on my crop tool in Gimp. I didn't do that this time but worked with point of view to compose with just the camera. 

Tuesday, February 1, 2022

AYWMC: Aperture Study

My "A Year With My Camera" lessons arrive in my inbox on Wednesday evenings. I really look forward to them because I am enjoying this course and learning a lot. This week's email said we got a break this week for completing the first module of the course. I confess to being disappointed! But I did get a badge to display, so here it is.


So, this was a good week to review and practice the lessons about the technical aspects of photography. I've dabbled some in it for my everyday photography, but admit that none of it is intuitive yet. I still have to dip into my brain and recall the details and steps of the settings I want to work with. 

For this week's personal study, I thought I'd dig deeper into aperture, as one of the three things that controls exposure. I use the aperture priority mode on my camera comfortably. However, even though I have manual control of aperture in this mode, the camera still adjusts shutter speed and ISO to "correct" exposure. So, I haven't actually seen the results of my aperture choices in terms of exposure. I did two experiments to further explore aperture and my camera.

Experiment #1 was to take a series of photos on aperture priority mode, changing aperture with each photo. Then I checked to see what changes the camera made for each photo.

Aperture f/8.0, shutter speed 1/98 sec., ISO 100

Aperture f/11.0, shutter speed 1/82 sec., ISO 160

Aperture f/16.0, shutter speed 1/80 sec., ISO 320

Aperture f/22.0, shutter speed 1/82 sec., ISO 640

Aperture f/32.0, shutter speed 1/82 sec., ISO 1250

My observations:
  • The exposure stayed the same; only depth of field changed.
  • I changed the aperture.
  • The camera kept shutter speed about the same.
  • The camera increased ISO one full stop for each stop I changed the aperture.
  • This follows the rules of the exposure triangle.

Experiment #2 was to switch to manual mode and choose a mid-range shutter speed (1/64th second) and ISO (400). Then I took another series of photos, increasing aperture (which decreases the lens opening, which decreases light) with each photo.

Aperture f/4.0

Aperture f/5.6

Aperture f/8.0

Aperture f/11.0

Aperture f/16

Aperture f/22

Nothing profound or surprising in this exercise, but it was good to see with my own eyes what I've been reading about. I'm also pleased that I was about to find my way around manual mode a little easier. Practice really helps.