


© 2026 by Leigh at Leigh's Photography Journal
My current weaving project is inspired by nature through the seasons. I've made a start on winter, featuring winter colors of browns, gray, and white, but I am looking ahead at spring. My motif is leaves and since both spring and summer leaves are green, I'll need to differentiate between spring and summer greens. Since it's March, I can document the colors of sprouting leaves and new growth in spring. How do the newly sprouted leaves of spring differ from the mature greens of summer? This collection of photographs records my local greens of spring.
 |
| chickweed |
 |
| clover |
 |
| day lilies and cleavers |
 |
| forsythia |
 |
| honeysuckle (note the new leaves contrasted to the darker old leaves) |
 |
| pine tree |
 |
| spirea |
 |
| I have no idea what this is |
 |
| an unknown grass |
© 2026 by Leigh at Leigh's Photography Journal

|
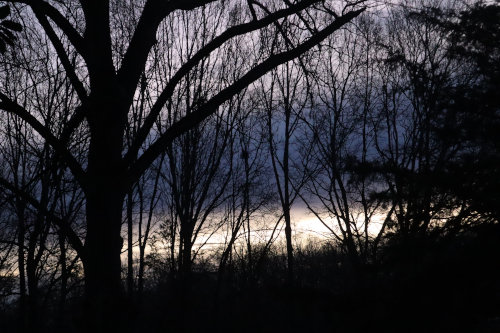
| Stripes of horizontal branches |

|
| Stripes in stacked firewood |

|
| Stripes in a semicircle |

|
| More semicircular stripes |
© 2026 by Leigh at Leigh's Photography Journal


Maybe a more accurate term is bands of color rather than stripes. I am photographing bands of color as presented by the clouds, the sunrise, and the landscape. Not that bands aren't stripes, but I find myself making a distinction for the design process and how I might translate them into weaving.

 |
| Fog on the field |


I've had a weaving idea percolating in the back of my brain for a couple of years now. But with 2025 pretty much dedicated to house repairs, reconstruction, and remodeling, manifesting that idea has been on hold. But the much anticipated end of the above activities is in sight, when I can at last utilize the room under construction. I'm very much looking forward to organizing that room to make it useful again.
This nature study is step one. I'm making a collection of photographs that feature bands of color from the sky with visual texture from the tree branches. From there I'll explore weave patterns inspired by those textures.
These are all sunrises.


I'm joining Rain's Thursday Art and Dinner Date! This week's theme is crescent moon. My offering is November's crescent moon at sunset.


