This post is part of a series entitled
A Year With My Camera.
Lesson 5.4 in my own words
-
Split Toning
- Changes the colors of dark tones and highlights separately.
- In darkroom developing, it adds a golden sepia tone to black and whites.
- With digital developing (editing), any color can be used.
- Lightroom updated split toning to "color grading."
- Graduated Filter
- A type of neutral density filter (from "What is an ND Filter and Why You Need One.")
- A filter is a glass or resin camera lens attachment that impacts light hitting the camera's sensor.
- Examples: UV filter, polarizing filter, etc.
- An ND filter
- Reduces the amount of light hitting the camera's sensor.
- Allows wider aperture and longer shutter speed in bright conditions.
- In editing software, it applies an exposure adjustment in the form of a gradient.
- It's like a sheet of clear plastic graduated from black at the bottom to clear on top and placed over an image.
- Very useful for bringing back detail to blown out skies in RAW images
- RAW images retain information about the details of the clouds
- JPEGs discard that information when processing the image.
- Cloning
- How to deal with dust, specks on an image, annoying highlights, or other distractions.
- Samples one area of an image and allows you to paint over the flaw.
- Done with "clone" or "heal" tools.
- Vignette
- Darkens the area around the subject.
- Can draw subtle attention to the subject of the photo.
- Be careful not to overdo.
This week's project
- Pick one or two of the advanced edits to experiment with.
- Don't worry about trying to keep the edits realistic yet. The point of the module is to learn what your editing software can do.
Graduated Filter. This was the first technique I wanted to try. And I
knew exactly what image I wanted to experiment with. It's
one I took for my homesteading blog last month. The subject was muscadine vines growing on the pergola. The day was sunny
and the sky was blue with white and grey clouds. The photograph however, made
the sky look like a high overcast. Nothing I tried in GIMP could fix it.

|
| Original JPEG produced by my camera. |
The I loaded the RAW version of the image into RawTherapee, my RAW editing software, and started to experiment.

|
| RAW image corrected with the graduated filter. |
That second photo looks like what I actually saw! Even though it's been edited
with computer software, it's the more accurate image of the two.
Vignette. I understood this better when I started playing with the tool. The
first image below is without the effect applied, the rest are gradually
increasing it.
 |
| Original unedited image. |
 |
| Vignette effect applied. |
 |
| A little more. |
 |
| And a little more. |
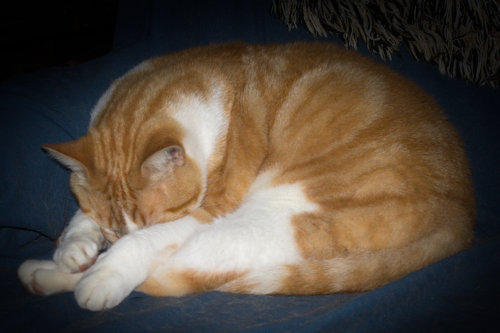
Split Toning. Sometimes called "color toning." It is called "color correction" in RawTherapee. This is another one I had to experiment with to understand. For my image, I chose cloudy sky, because everybody knows what sky is supposed to look like.
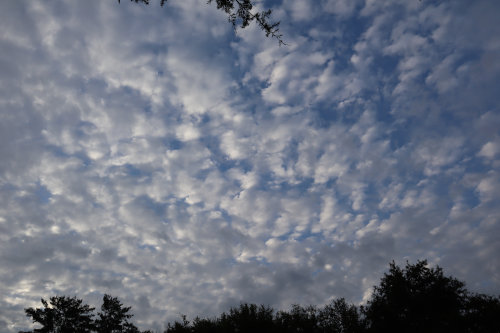 |
| Original unedited image. |
Here are my experiments. The assignment said not to worry about realism, so I didn't.
 |
| Hue adjusted. (I went for wild!) |
 |
| Then I adjusted highlights. |
 |
| Shadows adjusted. |
 |
| Lastly, mid-tones adjusted. |
I didn't experiment with cloning, because I'm already familiar with it.
What I learned
- The graduated filter is extremely useful. I thought my problem with the washed out sky was due to my lack of camera skills, but now see it's a limitation of the camera. I know I'll use this in the future.
- Vignette is nice to know about, but I doubt I'll use it much.
- The Vignette feature in RawTherapee is much more subtle than the one in GIMP.
- Split toning is interesting, and I can see using it for artistic versions of images.
- I think a lot more can be done with the split toning, but that's more advanced than I can comprehend at the moment.
- Because I think of my photography as accurate record keeping, so I'm not sure I'll use this feature much.
2 comments:
Leigh, I have also experienced the difference between what I saw and what the picture showed. I get it now- thanks!
TB, one of my most valuable takeaways from this course is understanding that the camera doesn't see as the eye does. So, what it records isn't identical to what our eyes see. That has been tremendously freeing in terms of working with the editing software. My inclination to tweak the photo isn't cheating, because the camera is only doing what it's programmed to do. That's neither good nor bad, it's just the limitations of the equipment I have to work with. Adjusting the image is a tool to make it more accurate. Since so much of my photography is for the purpose of documenting, it's a good thing.
Post a Comment